How to Make Tissue Paper Flowers (Classic Pom Method)
Stack, accordion-fold, tie and fluff: the classic tissue paper flower explained, with a size chart, petal edge options and fixes for tears and lopsided blooms.
Tutorial at a glance
- Difficulty Easy
- Estimated time About 15 to 20 minutes
- Recommended paper Standard gift-wrap tissue paper, 6 to 10 sheets per flower
Materials
- Tissue paper, 6 to 10 sheets per flower
- Thin floral wire, a chenille stem or strong thread
- Scissors
- Ruler (optional)
- Ribbon or clear thread for hanging (optional)
The classic tissue paper flower is made by stacking sheets, folding the stack like a fan, tying it in the middle and pulling the layers apart one at a time. It needs no glue and no template, and the same four moves produce anything from a small table flower to a large hanging pom. The method is simple; the results depend on a few choices made before the first fold.
The method in four moves
- Stack. Lay 6 to 10 sheets of tissue paper in a neat pile with the edges lined up.
- Fold. Accordion-fold the whole stack, back and forth, into a narrow strip.
- Tie and trim. Tie the strip tightly at its exact center and shape both ends with scissors.
- Fluff. Fan the strip out and separate the layers, pulling each one gently toward the center.
Everything below is detail on those four moves.
Materials
- Tissue paper in one or more colors
- Thin floral wire, a chenille stem or strong thread for tying
- Scissors
- Optional: a ruler for even folds, and ribbon or clear thread for hanging
Standard gift-wrap tissue is the recommended paper. It is thin enough to gather tightly at the tie and light enough to hold a fluffed shape. Stiffer papers do not work with this method; the comparison of cardstock, crepe, tissue and other papers explains why each behaves so differently.
Choosing a size
The finished flower comes out a little smaller than the length of the folded strip. Use the chart as a starting point and adjust after the first one.
| Sheet size | Sheets | Fold width | Approximate flower |
|---|---|---|---|
| 6 x 6 inches (15 x 15 cm) | 6 | 1/2 inch (1.3 cm) | About 5 inches (13 cm) |
| 10 x 10 inches (25 x 25 cm) | 8 | 3/4 inch (2 cm) | About 9 inches (23 cm) |
| 14 x 20 inches (36 x 51 cm) | 8 to 10 | 1 to 1.5 inches (2.5 to 4 cm) | About 12 inches (30 cm) |
For the largest size, fold across the 20-inch side so the finished strip is 14 inches long. More sheets make a denser flower; fewer make a lighter, airier one that is quicker to fluff.
Folding, tying and trimming
Start at one edge of the stack and fold it over by the chosen fold width. Flip the stack and fold back the same amount. Continue, flipping each time, until the whole stack is one pleated strip. Press each crease firmly with a fingertip; sharp creases make the layers easier to separate later.
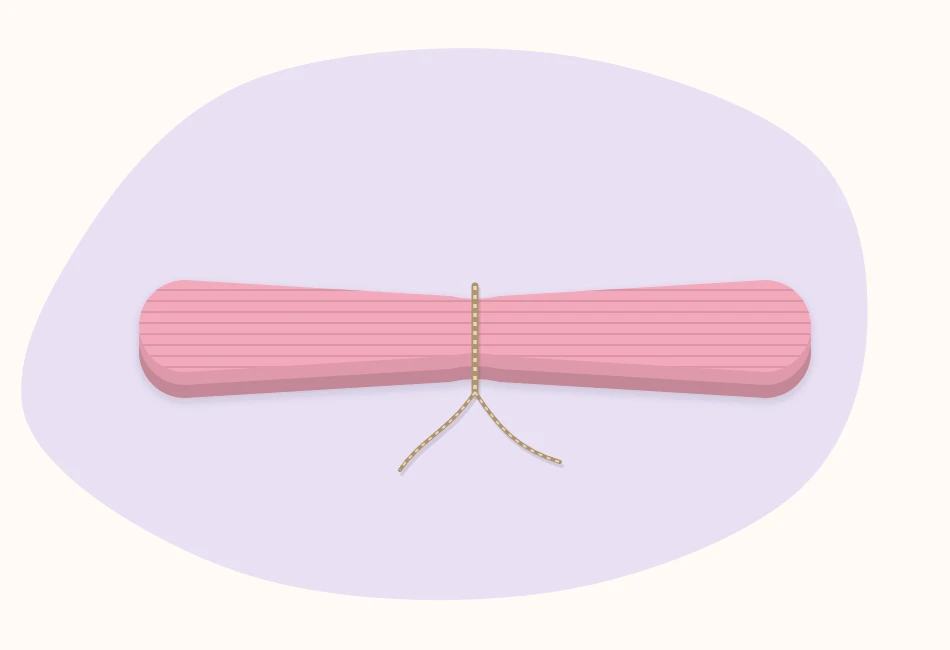
Find the center by folding the strip in half end to end and pinching a light mark. Wrap wire or a chenille stem around that mark and twist it snug. The tie should bite into the paper slightly. If the flower will have a stem, leave the wire ends long.
Now shape both ends of the strip. This cut becomes the edge of every petal, so it sets the character of the flower.
| End cut | Resulting look |
|---|---|
| Rounded | Soft, full petals, similar to a peony or garden rose |
| Pointed | Spiky petals, similar to a dahlia |
| Fine fringe, about 1 inch (2.5 cm) deep | Feathery edge, similar to the simple paper carnation made for Mother’s Day |
| Left straight | A blunt, ruffled ball |
Tip
Thick stacks are hard to cut cleanly in one pass. Cut the curve in two or three bites with the base of the scissor blades, and do not worry about small steps in the edge; they vanish once the layers are fluffed.
Fluffing without tearing
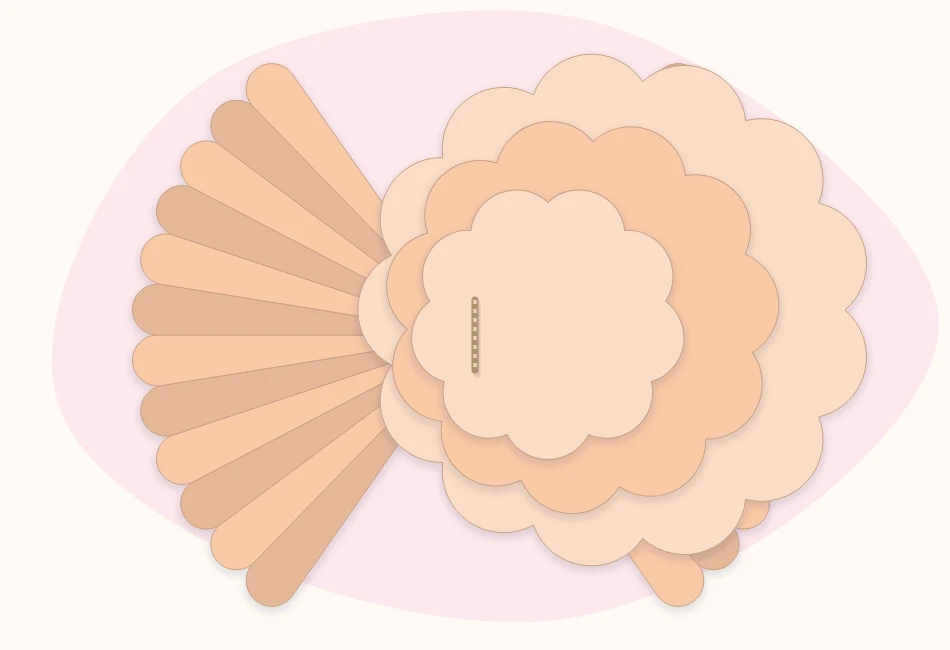
Fan both halves of the strip out so they form a rough circle. Then work one half at a time.
- Find the top sheet. At one side, separate the single top layer from the rest of the stack.
- Pull from near the tie. Slide fingers down close to the center and lift the sheet up toward the middle. Pulling from the outer edge is what causes tears.
- Repeat layer by layer. Bring up each sheet in turn, leaving the last one or two flat to form the back.
- Do the other half. Repeat on the opposite side, then go around the flower nudging layers into any gaps.
Flower or hanging pom?
The only difference is where the layers go. For a flower with a flat back, pull every layer up to the same side. It will sit on a table, tape to a wall or take a wire stem. For a round pom to hang, pull half the layers up and half down so the ball is even all around, then tie ribbon or clear thread to the center wire.
If this happens, do that
- A sheet tears. Keep going. Tuck the torn part toward the center; surrounding layers hide it. Next time, pull closer to the tie and more slowly.
- The flower is lopsided. The tie was off-center. On a flat-backed flower, trim the longer side lightly with scissors after fluffing.
- The center shows a hard gap. The tie is loose. Twist it tighter, or tuck in a small scrunched piece of matching tissue.
- The flower looks thin. Add two more sheets next time, or make narrower folds, which create more ripples per layer.
- It got crushed in storage. Tissue can be re-fluffed by hand several times. Advice on boxes and dust is in the guide to storing and caring for paper flowers.
Color ideas
- Ombre. Stack from dark at the bottom to light at the top for a flower that pales toward the center.
- Contrasting center. Make the top two sheets yellow and trim them an inch shorter at each end before folding.
- Two-tone edges. Alternate two close shades, such as pink and peach, sheet by sheet.
Because they are quick and light, tissue flowers are a natural fit for table and wall displays at celebrations. The roundup of paper flower party decoration ideas suggests where to place them.
Watch out
Tissue paper catches fire very easily. Keep tissue flowers well away from candles, hot light bulbs and heaters, and supervise young children with scissors and wire ends.
Frequently asked questions
How many sheets of tissue paper do you need for one flower?
Between 6 and 10 sheets is a good starting range. Six sheets suit a small flower; eight to ten make a large flower look full. More sheets give a denser bloom, fewer give a lighter one.
How do you fluff tissue paper flowers without tearing them?
Separate one layer at a time and pull from close to the center tie rather than from the outer edge. Work slowly, lifting each sheet toward the middle. Small tears can be tucked inward, where other layers hide them.
What is the difference between a tissue paper flower and a pom pom?
Only the direction of the layers. Pulling every layer to one side gives a flower with a flat back. Pulling half the layers up and half down gives a round pom that can hang from a thread.
Do tissue paper flowers need glue?
No. The center tie holds all the layers together. Glue or tape is only needed if the finished flower is being attached to a surface.