Easy Paper Daisy: A First Flower in About 15 Minutes
Two white circles snipped into petals and one yellow disc make a quick, forgiving first paper flower. No template needed.

Tutorial at a glance
- Difficulty Easy
- Estimated time About 15 minutes
- Recommended paper 65 lb white cardstock or 120 gsm text-weight paper
Materials
- White 65 lb cardstock or 120 gsm text-weight paper
- Scrap of yellow paper
- Round object about 3 inches (7.5 cm) across to trace
- Round object about 1 inch (2.5 cm) across to trace
- Pencil
- Scissors
- Tacky craft glue or a glue stick
- Wooden skewer for curling (optional)
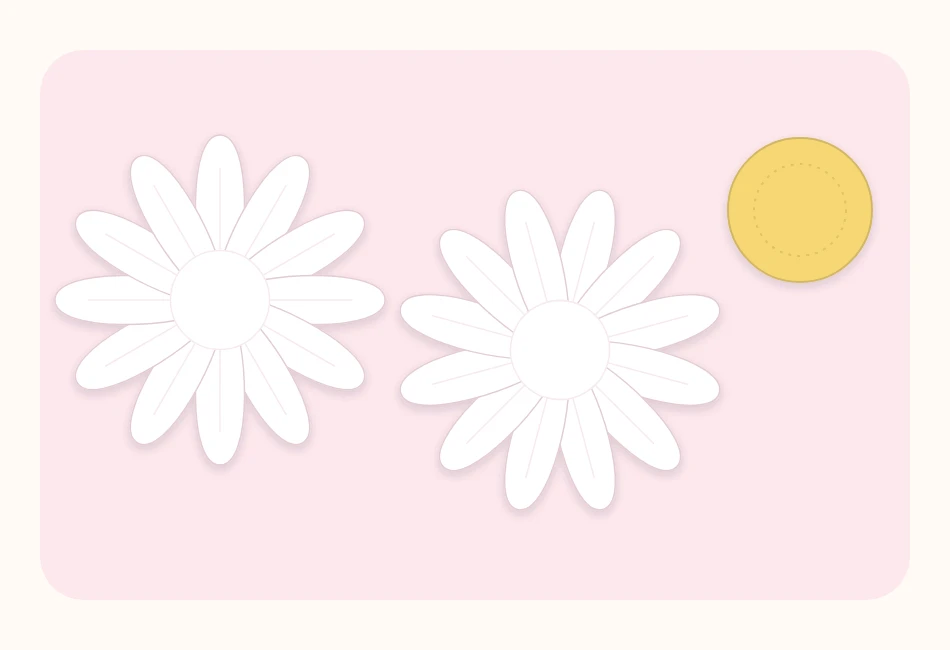
An easy paper daisy is two white circles snipped into petals, stacked off-center from each other, with a yellow disc glued in the middle. There is no template to print and no petal to cut out one at a time, which is why it works so well as a very first flower. Most beginners can expect to finish one in roughly a quarter of an hour, and later ones go faster.
Gather this before you start
- White paper: 65 lb cardstock or a sturdy 120 gsm text-weight sheet
- A scrap of yellow paper for the center
- Something round to trace, about 3 inches (7.5 cm) across, such as a jar lid or a cup
- Something smaller to trace for the center, about 1 inch (2.5 cm) across, such as a bottle cap or a coin
- A pencil, scissors and tacky craft glue or a glue stick
- Optional: a wooden skewer or the pencil itself for curling petals
Cardstock gives a crisp daisy that keeps its shape. Text-weight paper is easier for small hands to cut and makes a softer flower. Thin printer paper works for practice but tends to go limp. If the craft drawer is still empty, the beginner’s checklist of materials and tools sorts what is worth buying first from what can wait.
A rough time plan
The times below are loose estimates for a first attempt, offered only to show where the minutes go.
| Stage | What happens | Rough time |
|---|---|---|
| Trace and cut circles | Two white circles, one yellow disc | About 3 minutes |
| Cut the petals | Twelve snips per circle, then rounding | About 6 minutes |
| Shape | Curl or crease each petal | About 3 minutes |
| Assemble | Stack, glue, add the center | About 3 minutes |
Cutting the petals with the clock trick
The only part that needs any thought is dividing a circle into even petals without measuring. Picture the circle as a clock face.
- Trace and cut two white circles. Both should be the same size. Cut the yellow center disc at the same time and set it aside.
- Mark the middle. Lightly trace the small round object in the center of each white circle. This pencil ring is the stop line; no cut should cross it.
- Cut at 12, 3, 6 and 9. Snip straight in from the edge to the stop line at the four main clock positions. The circle now has four equal quarters.
- Cut each quarter into three. Make two more evenly spaced snips in each quarter. That gives twelve petals per circle.
- Round the tips. Trim the two square corners off the end of every petal so each one finishes in a soft curve. Then widen each cut into a narrow V so the petals stand slightly apart.
Tip
Petals do not need to match exactly. Slightly uneven widths look more like a real daisy than twelve perfect copies.
Shaping and putting it together
- Give the petals some life. Choose one: pull each petal gently over a skewer so it curls upward, or pinch a light crease down the middle of each one. Curled petals look soft; creased petals look crisp.
- Stack the circles off-center from each other. Put a dot of glue in the middle of one circle and press the second on top, turned so its petals sit over the gaps of the layer below.
- Add the center. Glue the yellow disc over the pencil ring, which hides it completely. Press for a few seconds.
- Lift the top layer. Once the glue has set, bend the top petals up a little at their bases so the daisy has depth instead of lying flat.
Four ways to change the center
- Dotted. Press the tip of a pencil into the yellow disc from the back, over a soft surface, to raise small bumps.
- Fringed. Cut a yellow strip about half an inch by 6 inches (1.3 x 15 cm), snip a fine fringe along one edge, roll it up and glue it in place of the flat disc.
- Domed. Cut a slit from the edge of the disc to its middle, overlap the cut edges slightly and glue, forming a shallow cone.
- Layered. Glue a smaller orange disc on top of the yellow one.
The fringed version is a small preview of the technique used for the center of a paper sunflower, a good second project once the daisy feels comfortable.
Making daisies with children
This flower suits a mixed-age table because the jobs divide easily. An adult or older child can trace and cut the circles; younger children can round the petal tips with blunt-ended safety scissors, choose the centers and do the gluing with a glue stick. Keep sharp scissors and pointed skewers with the adults, and skip hot glue entirely for this project, since ordinary craft glue holds flat paper layers without any trouble.
When something goes sideways
A petal got cut off
A snip went past the stop line. Glue the loose petal back under the center disc; the join will not show.
The daisy looks like a pinwheel
The petal tips are still square. Round them more, and widen the V between petals.
The layers will not stay turned
Wet glue lets the top circle spin. Hold it in position for a slow count of ten, or use a glue stick, which grabs faster on flat paper.
Where to use a finished daisy
Because the back is flat, this daisy sticks to almost anything. A few ideas:
- Glue one to the front of a blank card or a gift tag.
- Tape a green paper straw or a wrapped wire to the back for a stem and stand several in a small jar.
- Make a dozen in two sizes and string them into a paper flower garland for a shelf or window.
- Scale the circles down to 1.5 inches (4 cm) for cupcake picks or napkin rings.
Changing the paper color changes the flower: yellow petals with a brown center suggest a black-eyed Susan, and pink or lilac petals make a simple cosmos. For a wider view of what to try after this, the overview of paper flowers for beginners lays out a sensible order of first projects.
Frequently asked questions
What paper is best for an easy paper daisy?
65 lb cardstock gives a crisp daisy that holds its shape. A sturdy 120 gsm text-weight paper is easier to cut, especially for children, and makes a softer flower. Thin printer paper is fine for practice but tends to go limp.
How do you cut even daisy petals without a template?
Treat the circle like a clock face. Cut in from the edge at the 12, 3, 6 and 9 positions, stopping at a traced ring in the middle, then make two more evenly spaced cuts in each quarter. That gives twelve petals.
Can children make this paper daisy?
Yes, with the jobs divided. An adult or older child can cut the circles, while younger children round the petal tips with safety scissors and do the gluing with a glue stick. Hot glue is not needed for this project.