How to Make a Paper Poinsettia for the Holidays
A cardstock poinsettia built from two sizes of creased red bracts, three green leaves and a cluster of yellow beads, with starting sizes and fixes for common problems.
Tutorial at a glance
- Difficulty Easy
- Estimated time About 40 minutes, plus drying time
- Recommended paper 65 lb cardstock (about 176 gsm) in red and green
Materials
- Red cardstock, one letter-size sheet
- Green cardstock, half a sheet
- Small yellow beads or yellow tissue paper for the center
- Scissors and a pencil
- Tacky craft glue or a low-temperature hot glue gun
- Ruler and a blunt scoring tool
- 18-gauge floral wire and green floral tape (optional stem)
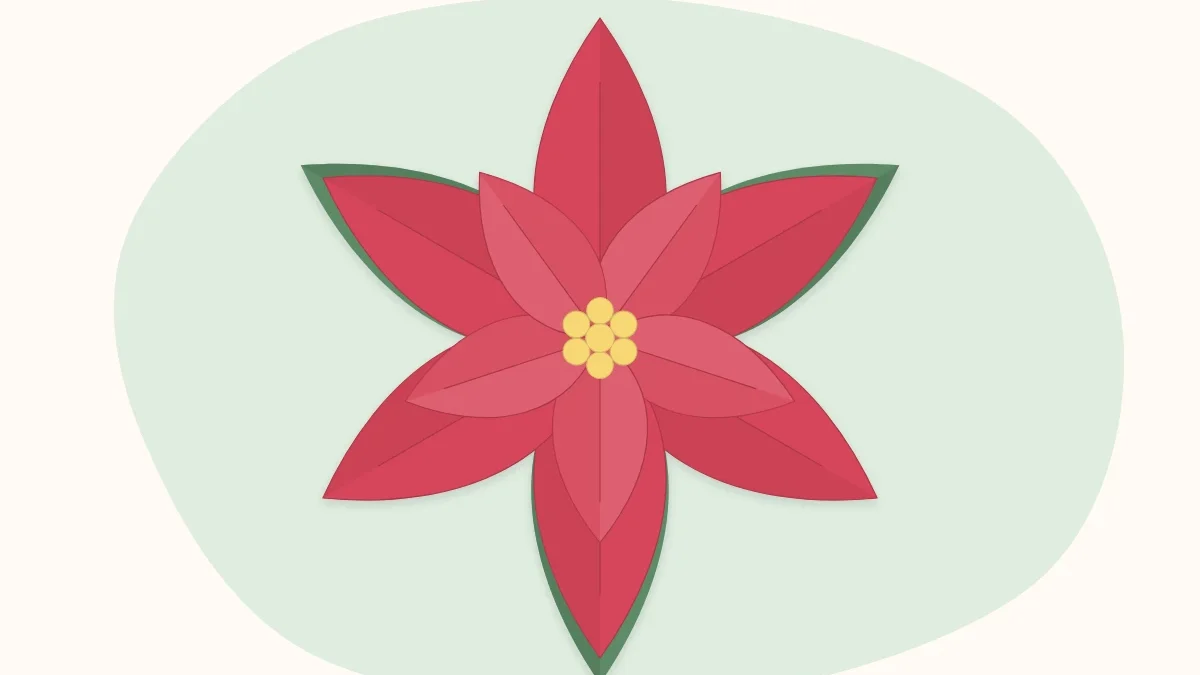
A paper poinsettia is one of the more forgiving holiday flowers to make, because the real plant is so simple in outline: pointed red “petals” in loose layers around a small cluster of yellow dots. Those red parts are actually bracts, which are colored leaves, and the true flowers are the tiny yellow buds in the middle. Getting that structure right is what makes a paper version recognizable, and it takes only three shapes.
Tip
Because bracts are leaves, they should look like leaves: a clear center crease, a pointed tip and a slightly uneven arrangement. A poinsettia that is too neat and symmetrical reads as a star rather than a plant.
Project overview
| Finished size | About 7 inches (18 cm) across |
|---|---|
| Recommended paper | 65 lb cardstock (about 176 gsm) in red and green |
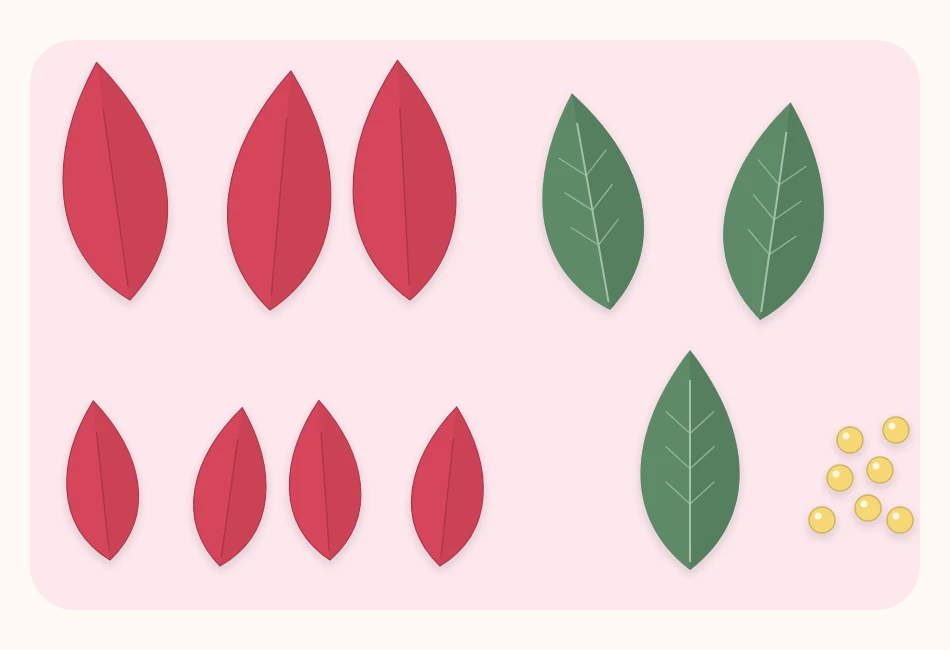
| Pieces to cut | 6 large bracts, 5 small bracts, 3 leaves, 1 base circle |
| Center | 5 to 7 small yellow beads, or rolled balls of yellow paper |
Materials
- Red cardstock, one letter-size sheet
- Green cardstock, half a sheet
- Small yellow beads about 1/8 to 3/16 inch (3 to 5 mm), or a strip of yellow tissue or crepe paper to roll into balls
- Scissors and a pencil
- Tacky craft glue, or a low-temperature hot glue gun
- A ruler and a blunt scoring tool, such as an empty ballpoint pen or the back of a butter knife
- Optional: an 18-gauge floral wire and green floral tape for a stem
Cut the bracts and leaves
The sizes below are starting points. Make everything larger for a wreath centerpiece or smaller for a gift tag.
- Large bracts (6): 3.5 inches long and 1.5 inches wide (9 x 4 cm)
- Small bracts (5): 2.5 inches long and 1 inch wide (6.5 x 2.5 cm)
- Green leaves (3): 4 inches long and 1.75 inches wide (10 x 4.5 cm)
- Base circle (1): 1.5 inches (4 cm) across, in red or green
The bract shape is a slim, pointed oval: widest about one third of the way up from the base, tapering to a sharp tip, and narrowing to a base roughly 0.25 inch (6 mm) wide. To keep both sides even, fold a piece of cardstock in half, draw half the shape against the fold and cut through both layers. The fold then doubles as the center vein. For the green leaves, use the same outline but cut one or two shallow notches into each side, which mimics the lobed edge of a real poinsettia leaf.
Cutting eleven matching bracts goes faster with a traced template and a small stack; the guide to cutting petals with templates and stacks shows how to do that without the layers slipping.
Shape the pieces
- Crease the center vein. If a piece was not cut on a fold, score a line from base to tip with the blunt tool and a ruler, then fold along it and open it back out to a shallow V.
- Add side veins. Score three or four light diagonal lines from the center vein toward each edge, angled toward the tip. Do not fold these. This step is optional.
- Curve the tips. Pull the top third of each bract gently over a pencil so the tip bends slightly backward. Curve some more than others.
- Pinch the base. Squeeze the narrow end of each bract along its crease so it stands up a little from the surface when glued.
Assemble the poinsettia
- Glue the leaves to the base. Put the base circle on the work surface. Glue the three green leaves to it first, spaced roughly evenly, with their tips pointing outward and the bases meeting at the center. They will show between and beyond the red bracts.
- Add the large bracts. Put a dot of glue on the underside of each base and arrange the six large bracts in a ring on top of the leaves, tips out. Leave them slightly irregular: a couple closer together, one tilted a little.
- Add the small bracts. Glue the five small bracts in a second ring on top, each sitting over a gap between two large bracts. Because the bases are pinched, this layer should lift up at a steeper angle than the first.
- Let it set. Give tacky glue a few minutes to grip before adding the center, so the weight of the beads does not shift the top layer.
- Make the center. Put a pea-sized dot of glue in the middle and press in five to seven yellow beads in a tight cluster. For an all-paper version, tear small pieces of yellow tissue or crepe, roll each between finger and thumb into a ball about the size of a peppercorn, and glue those in instead.
- Dry flat. Leave the flower undisturbed for about 30 minutes.
Watch out
Paper decorations and holiday candles are a poor combination. Keep poinsettias well away from candle flames, fireplaces and any light bulbs that get hot, and keep beads away from small children and pets.
Adding a stem (optional)
For a poinsettia that stands in a vase or pot, make a small hole in the center of the base circle before assembling. Bend the top 0.5 inch (1.2 cm) of an 18-gauge wire into a flat spiral or loop, push the straight end down through the hole so the loop sits on top of the base, and glue it in place before adding the leaves. Wrap the wire with green floral tape from the base downward. Full instructions for wrapping and for wiring individual leaves are in the guide to making stems and leaves with wire and tape. Wire ends are sharp, so cut them with wire cutters rather than scissors and cover the cut end with tape.
Common problems
The flower looks like a flat star
The bracts were probably glued down without a crease or a pinch at the base. Slide a fingertip under each tip and lift, then re-curve the tips. On the next one, pinch every base before gluing.
The top layer hides the bottom layer
The two bract sizes are too close. Trim the small bracts a little shorter, or offset them so they sit clearly over the gaps.
Variations and ways to use it
- White or blush poinsettia. Cream, soft pink or a red-and-white mix all exist among real poinsettias and suit a quieter color scheme.
- Crepe paper version. Cut the bracts from heavy crepe with the grain running base to tip and stretch the middle of each slightly for a softer look. Glue a thin wire along the back of each one if they need support.
- Tree ornament. Make it at half size and glue a loop of thread to the back of the base.
- Wreath accent. Three poinsettias grouped on one side of a ring make a full holiday door piece; the method for attaching flat-backed flowers is in the paper flower wreath tutorial.
Frequently asked questions
What paper is best for a paper poinsettia?
Cardstock around 65 lb (about 176 gsm) holds a crease well and keeps the pointed bracts from drooping. Heavy crepe paper gives a softer, more natural look but may need a thin wire glued behind each bract for support.
How many petals does a paper poinsettia need?
A good starting point is six large and five small red bracts in two layers, plus three green leaves underneath. The numbers can be adjusted; slightly uneven spacing looks more natural than a perfect star.
What can be used for the yellow center?
Small yellow beads glued in a tight cluster work well. For an all-paper flower, roll tiny pieces of yellow tissue or crepe paper into balls and glue those in the middle instead.