Accordion Fold Paper Flowers: No Template Needed
Pleat a long paper strip, join it into a ring and press it flat for a round rosette flower. One sizing rule and a strip-length chart replace the template.

Tutorial at a glance
- Difficulty Easy
- Estimated time About 20 minutes
- Recommended paper Text-weight paper, about 80 to 120 gsm
Materials
- Text-weight paper, about 80 to 120 gsm, cut into strips
- Small pieces of cardstock for the back and center circles
- Ruler and pencil
- Scissors or a paper trimmer
- Tacky craft glue
- Low-temperature glue gun (optional)
Accordion fold paper flowers are made from nothing more than a long strip of paper pleated back and forth, joined into a ring and pressed flat into a round rosette. There is no template because there are no petal shapes to trace: the folds themselves become the petals. One simple rule sets the size, and a pair of scissors can change the petal edge in a single cut.
The one rule: strip width is half the flower
When the pleated ring is pressed flat, the strip’s width becomes the distance from the center of the flower to its edge. So the finished flower is twice as wide as the strip.
Length is more flexible. A strip needs to be long enough for the pleats to travel all the way around the outer edge and still keep some depth. As a starting point, allow a total length of six to eight times the finished width of the flower. Shorter strips make shallow, stretched pleats; longer strips make deep, crowded pleats and a fuller flower.
| Strip width | Finished flower | Total strip length | Pleat width |
|---|---|---|---|
| 1 inch (2.5 cm) | 2 inches (5 cm) | 12 to 16 inches (30 to 40 cm) | 1/4 inch (6 mm) |
| 1.5 inches (4 cm) | 3 inches (7.5 cm) | 18 to 24 inches (46 to 61 cm) | 3/8 inch (1 cm) |
| 2 inches (5 cm) | 4 inches (10 cm) | 24 to 32 inches (61 to 81 cm) | 1/2 inch (1.3 cm) |
| 3 inches (7.5 cm) | 6 inches (15 cm) | 36 to 48 inches (91 to 122 cm) | 3/4 inch (2 cm) |
A standard letter sheet is only 11 inches long, so most flowers need two or more strips glued end to end. That is normal and the joins hide inside the pleats.
Paper and supplies
Text-weight paper between about 80 and 120 gsm is the recommended choice. It folds sharply without cracking and is light enough to gather at the center. Patterned scrapbook paper of that weight works well and makes good use of double-sided sheets. Cardstock at 65 lb can be used for larger flowers, but score each fold line first with a ruler and a blunt point, such as an empty ballpoint pen. Papers and tools are compared in more depth in the materials checklist for beginners.
- Paper strips cut to the chosen width
- Ruler and pencil
- Scissors or a paper trimmer
- Tacky craft glue, plus a low-temperature glue gun if available
- Two small circles of cardstock per flower: one for the back, one for the center
Fold the strip
- Cut the strips. Cut enough strips of the same width to reach the total length in the chart. Straight, parallel edges matter more here than in most paper flowers, so measure both ends before cutting.
- Make the first fold a guide. Fold one short end over by the pleat width and crease it firmly. Check that the fold is square to the long edges; every later fold copies this one.
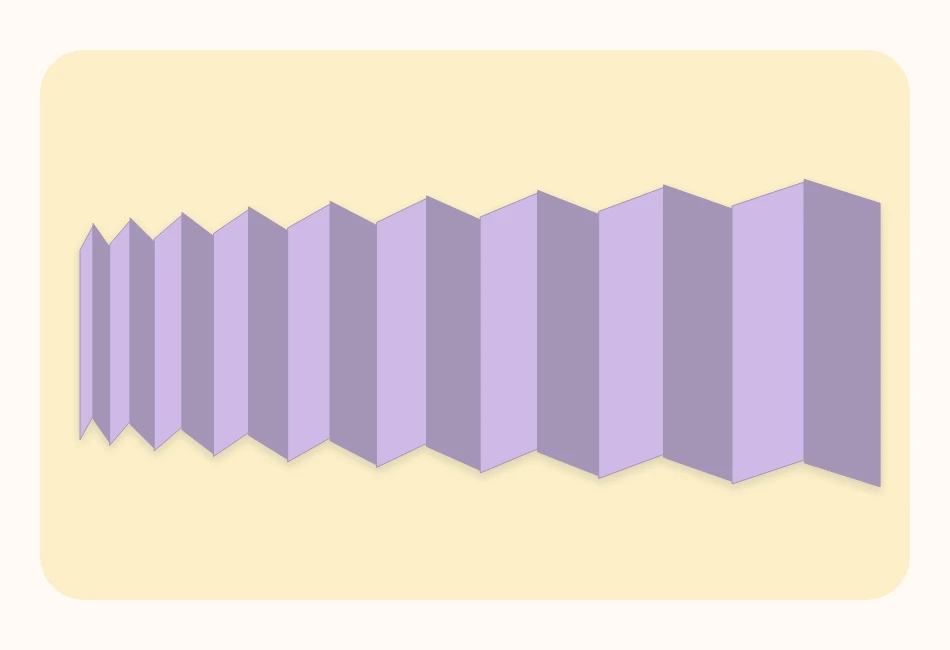
- Pleat the whole strip. Flip the strip and fold back by the same amount, lining up the new fold with the edge of the one below. Continue to the end, flipping each time.
- Sharpen the creases. Squeeze the folded stack and run a thumbnail or the back of a spoon along both sides.
- Join the strips. Overlap the last pleat of one strip onto the first pleat of the next and glue them together, making sure the zigzag continues without a break. An end that points up must meet one that points down.
Tip
To change the petal shape, trim the folded stack before joining anything. Rounding one top corner of the stack gives scalloped petals; cutting it at an angle gives pointed ones. Cut one edge only, and keep that edge to the outside.
Close the ring and press it flat
- Form a ring. Glue the two free ends of the long pleated strip together the same way as the joins, creating a pleated tube. Let the glue set fully; this joint takes the most strain.
- Prepare the back circle. Cut a cardstock circle about half the width of the finished flower and cover it generously with glue.
- Gather and flatten. Stand the tube on the table. Push the top edge inward toward the middle with the fingers of both hands while letting the bottom edge slide outward. The tube collapses into a flat, pleated disc.
- Hold and glue. Keep one hand pressing on the center, since the disc will spring back up if released. Press the glued circle onto the middle and hold until it grabs. Hot glue is quick here; with tacky glue, set a small jar on top for several minutes.
- Add the center. Turn the flower over and glue a contrasting circle over the gathered middle on the front.
Watch out
The center of a rosette is a deep well of pleats, and hot glue pooled there stays hot longer than expected. Press the back circle down with the bottom of a jar, not with bare fingertips.
Quick fixes
| Problem | Why it happens | Fix |
|---|---|---|
| The ring will not flatten, or tears | The strip is too short for its width | Glue in one more pleated strip |
| The flower pops back into a tube | The glue was released too soon | Re-flatten and weight it until fully dry, with circles on both faces |
| Wavy, uneven outer edge | The pleats drifted out of square | Refold using the first pleat as a guide, or mark fold lines in pencil |
| Cracked fold lines | The paper is too heavy to fold unscored | Score first, or switch to text-weight paper |
| A large hole in the center | Wide pleats do not gather tightly | Use narrower pleats or a larger center circle |
Variations worth trying
- Layered flower. Make a 4-inch and a 2-inch rosette in different colors and glue the smaller on top before adding the center.
- Half flower. Fold a single short strip, pinch one long edge together and glue it, leaving a fan. Two or three fans make a tulip-like shape for cards.
- Two-color pleats. Alternate strips of two colors when joining, so the flower changes color in sections.
- A different center. Use a small rolled spiral rose in the middle; the method is in the tutorial on rolled paper roses.
Where these flowers fit best
Accordion flowers are flat, light and graphic, which suits them to surfaces more than to vases. A group in three sizes makes a simple backdrop; the guide to planning and hanging paper flower wall decor explains layout and safe ways to attach them. Smaller ones, with a loop of thread glued under the back circle, can be spaced along twine as a paper flower garland. Kept flat between sheets of tissue, they also store in very little space until they are needed again.
Frequently asked questions
How long should the strip be for an accordion paper flower?
As a starting point, allow a total strip length of six to eight times the finished width of the flower. A 4-inch (10 cm) flower uses a 2-inch (5 cm) wide strip about 24 to 32 inches (61 to 81 cm) long, usually made by gluing several shorter strips end to end.
What paper works best for accordion fold flowers?
Text-weight paper between about 80 and 120 gsm folds sharply and gathers easily at the center. 65 lb cardstock can be used for larger flowers if each fold line is scored first.
Why does my accordion flower keep popping back up?
The pleats are under tension until the glue has fully set. Keep the flower pressed flat under a small weight until the glue is dry, and glue a circle to both the back and the front for extra hold.