How to Make a Paper Dahlia from Rolled Cones
Build a domed paper dahlia from small squares rolled into cones and glued in tightening rings on a round base. No template needed.

Tutorial at a glance
- Difficulty Easy
- Estimated time About 1 hour, plus drying
- Recommended paper Text-weight paper, 80 to 120 gsm, with sturdy cardstock for the base
Materials
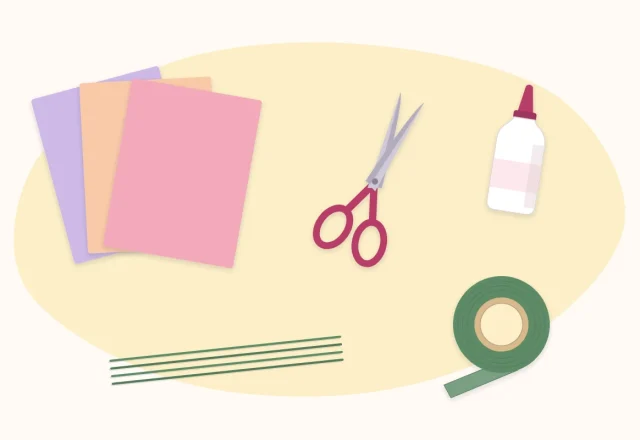
- 4 to 5 letter-size sheets of text-weight paper, 80 to 120 gsm
- Sturdy cardstock or thin cardboard for a 4 inch (10 cm) base
- Tacky craft glue or a low-temperature glue gun
- Scissors or a paper trimmer
- Ruler and pencil
- Ribbon or a paper tab for hanging (optional)
A cone-petal paper dahlia uses one shape, a small square rolled into a cone, repeated in tightening rings until the base disappears. There is no template and no shaping tool. The work is in the repetition: roughly 50 to 60 cones for a flower about 6 inches (15 cm) wide.
At a glance
| Finished size | About 6 inches (15 cm) across |
|---|---|
| Recommended paper | Text-weight paper, 80 to 120 gsm |
| Pieces | About 50 to 60 squares, plus one base circle |
| Skills used | Straight cutting, rolling, even spacing |
Why the paper weight matters here
A cone has to roll to a sharp point without creasing. Text-weight paper, the kind used for colored printer sheets, rolls smoothly and holds with a single dot of glue. Standard 65 lb cardstock can work for larger cones but tends to spring open and crack at the tip on small ones. Very thin paper rolls easily and then dents when handled. For more on matching weight to project, see the comparison of cardstock, crepe, tissue and text-weight papers.
The base is different. It carries the whole flower, so cut it from sturdy cardstock or thin cardboard.
Materials
- 4 to 5 letter-size sheets of text-weight paper in one color, or two close shades
- One piece of sturdy cardstock for the base
- Tacky craft glue, or a low-temperature glue gun for faster assembly
- Scissors or a paper trimmer, ruler, pencil
- A round object about 4 inches (10 cm) wide to trace
Prepare the squares and cones
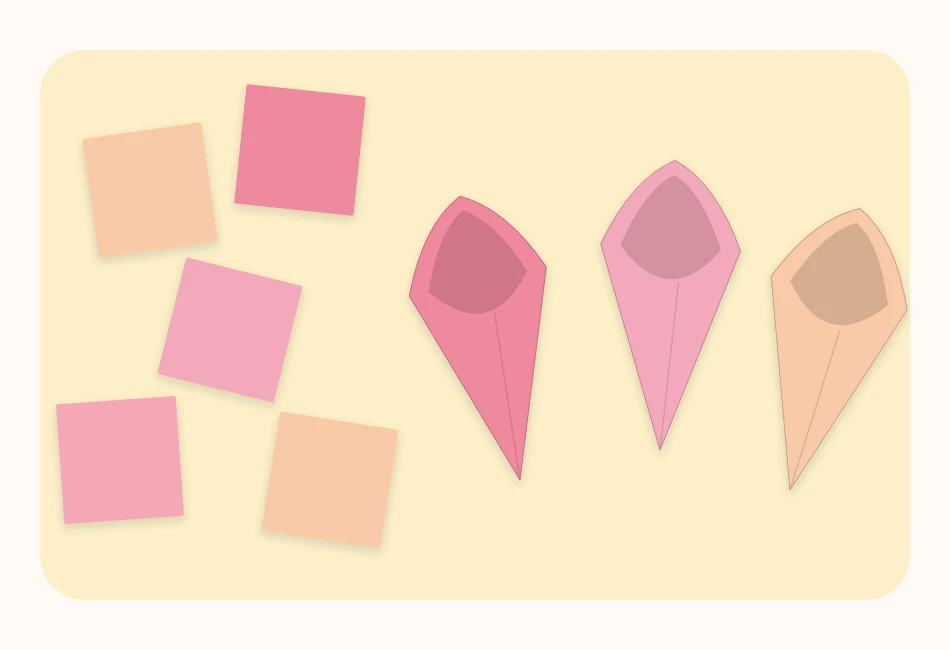
- Cut the squares. As a starting point, cut about 36 squares at 2 inches (5 cm), about 16 squares at 1.75 inches (4.5 cm) and about 8 squares at 1.5 inches (4 cm). Cutting strips first and then crossing them is quickest.
- Roll a cone. Hold a square as a diamond with one corner pointing toward you. Bring the left and right corners across each other so the bottom corner becomes a closed point and the top corner stands up as the petal tip.
- Glue the overlap. Put a small dot of glue under the top flap, press and hold for a few seconds. The opening should be about as wide as a fingertip.
- Repeat in batches. Roll all the squares of one size before starting the next, and keep the sizes in separate piles.
Tip
Always overlap the same side on top, right over left or left over right. Cones rolled in mixed directions catch the light differently, and the rings look uneven even when the spacing is perfect.
Build the flower ring by ring
- Cut the base. Trace and cut a 4 inch (10 cm) circle from the sturdy cardstock. Mark the center with a pencil dot.
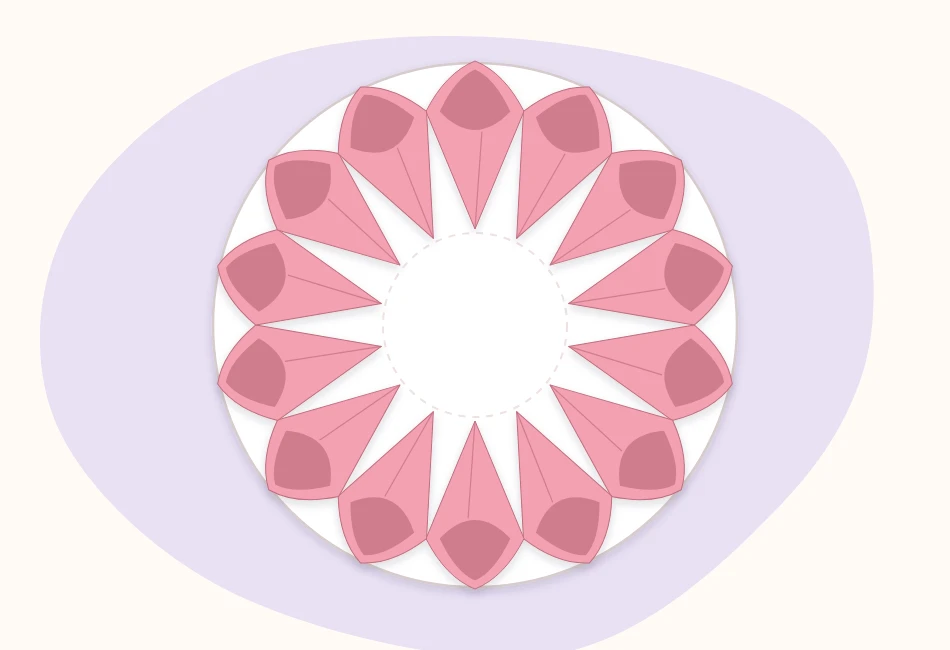
- Glue the outer ring. Run a line of glue along the seam side of a large cone and lay it on the base with its closed point aimed at the center dot and its open end hanging about 1 inch (2.5 cm) past the edge. Add cones side by side, touching, all the way around. Expect to use around 14 to 16.
- Add the second ring. Glue the next large cones on top, set about 1/2 inch (1.3 cm) closer to the center and placed over the gaps between the cones below.
- Continue inward. Use the remaining large cones for a third ring, then switch to the medium cones. Each ring needs fewer pieces than the one before.
- Tilt the inner rings. From about the fourth ring, lift the open end of each cone slightly so it points up and out instead of lying flat. This creates the dome that dahlias have.
- Fill the center. Stand the smallest cones almost upright with their points together in the middle. Three to five usually closes the gap.
Checkpoints while you work
Because every ring sits on the last one, small drifts add up. Pause after each ring and check three things.
- Is the ring round? Look straight down. If one side bulges, slide the last few cones before the glue sets.
- Do the cones sit over gaps? A cone directly on top of another makes a visible stripe running out from the center.
- Is the base still showing? From the front, only cones should be visible. If cardstock shows between them, tuck in an extra cone.
Troubleshooting
- Cones pop open.
- The paper is too stiff for the cone size, or the glue was released too soon. Use a slightly larger square, or hold each one a little longer.
- The center will not close.
- Cut a few 1.25 inch (3 cm) squares, roll them tighter, and stand them upright in the gap.
- The flower looks flat like a pinwheel.
- The inner rings were laid flat. Lift the next ring more steeply; the dome can still be recovered.
- Glue strings and shiny spots.
- Common with hot glue. Apply it to the base rather than the cone, and pull strings away once cool.
- Outer cones droop.
- Too much overhang for the paper weight. Keep the overhang to about half the cone length.
Several of these problems show up in other flowers too, and the list of common beginner mistakes and their fixes covers them more broadly.
Finishing and hanging
Let the flower dry flat for at least an hour before lifting it. For hanging, glue a short loop of ribbon or a folded paper tab to the back of the base. For a stem, glue a flat wire loop to the back and cover it with a second cardstock circle; a dahlia this size needs 18 gauge wire or two wires taped together.
Flat-backed dahlias are a natural fit for a grouped display, and the guide to planning and hanging a paper flower wall covers layout and spacing.
Watch out
Dozens of glue joins means dozens of chances for a hot glue burn. Use a low-temperature gun, keep fingers behind the glue line, and give children tacky glue instead.
Variations to try
- Ombre. Use the darkest shade for the outer rings and step lighter toward the center, or the reverse.
- Larger flower. Scale everything together: 3 inch (7.5 cm) squares on a 6 inch (15 cm) base, in light cardstock.
- Looser bloom. Roll the cones wider and use fewer per ring for a more open, informal flower.
- Closer to nature. Real dahlias range from tight pompons to spiky cactus forms; the RHS dahlia guide is a useful reference for shape and color ideas.
Frequently asked questions
How many cones does a paper dahlia need?
For a flower about 6 inches (15 cm) across on a 4 inch (10 cm) base, plan on roughly 50 to 60 cones. The exact number depends on how tightly the cones are rolled and spaced, so cut a few extra squares.
What paper is best for a cone dahlia?
Text-weight paper around 80 to 120 gsm rolls into small cones without cracking. Heavier cardstock suits larger cones and the base circle.
Why does my paper dahlia look flat?
The inner rings were probably glued lying flat. Tilting each inner ring a little more upright than the one before builds the domed center.