How to Cut Paper Flower Petals: Templates, Stacks and Clean Edges
Cut matching petals with clean edges: four basic petal shapes, a fold-and-cut method for symmetrical templates, stacking guidelines and scissor technique.
Clean petals come from three habits: a template you can trace again and again, paper stacked so several petals are cut in one pass, and a cutting motion where the paper turns and the scissors barely move. None of this needs special equipment. A sharp pair of scissors, a pencil and a scrap of cardstock are enough to start.
The four petal shapes worth learning
Most paper flowers are built from a handful of basic outlines. Learn to draw these four and you can adapt almost any tutorial.
| Shape | What it looks like | Typical flowers |
|---|---|---|
| Teardrop | Wide, rounded top narrowing to a point at the base | Roses, peonies, general-purpose petals |
| Heart | A teardrop with a small notch at the top | Outer rose petals, cherry blossoms, poppies |
| Pointed | Narrow, widest in the middle, pointed at the tip | Sunflowers, dahlias, daisies and the bracts of a holiday paper poinsettia |
| Rounded | Short and wide, like a spoon bowl with a flat base | Tulips, simple five-petal flowers |

Make a template that is truly symmetrical
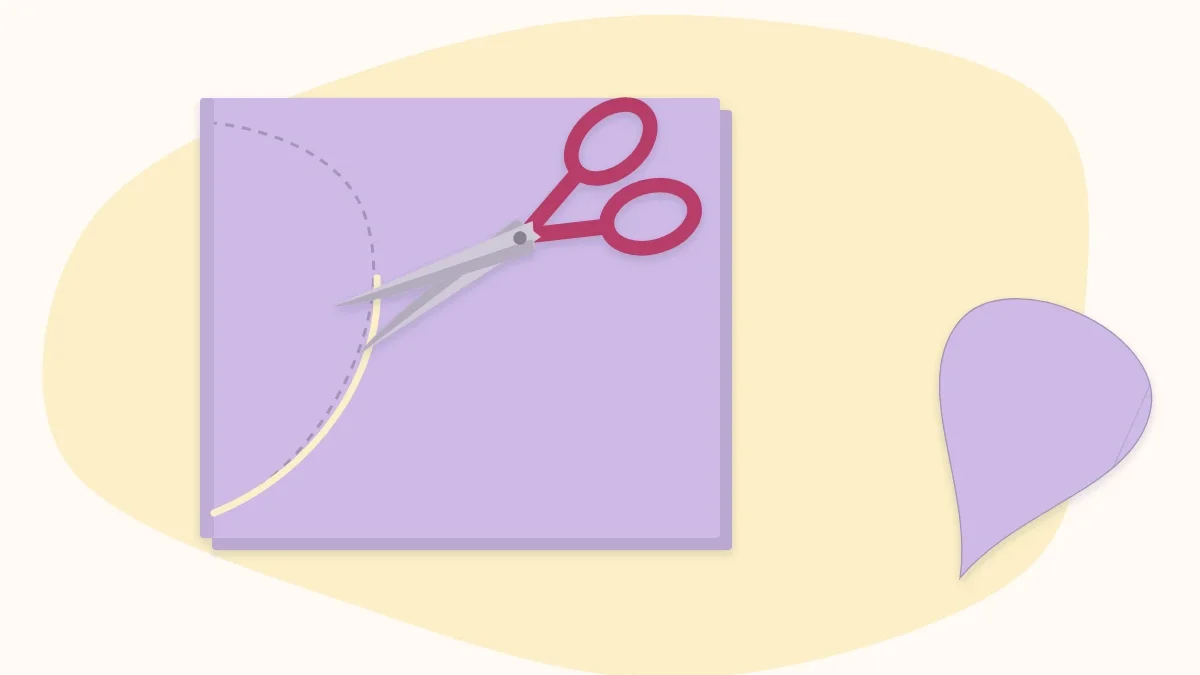
A petal drawn freehand almost always leans to one side. Folding fixes that:
- Fold a scrap of paper in half.
- Draw half a petal against the fold, with the center line of the petal on the fold itself.
- Cut through both layers and unfold. Both halves now match exactly.
- Trace the result onto cardstock and cut it out. Thin paper templates lose their edge after a few uses; a cardstock or cereal-box template lasts through a whole project.
- Label it in pencil with the flower and the size, for example “rose, outer, 3 in”.
Most flowers need the same shape in two or three sizes. Make the largest template first, then trace it and draw a new line about 1/4 inch (6 mm) inside the edge for the next size down.
Stack before you cut
Cutting petals one at a time is slow and gives slightly different petals every time. Stacking solves both problems. Fold a strip of paper back and forth into an accordion, with each panel a little wider than the template, or simply stack loose rectangles. Trace the petal once on the top layer and cut through the whole pile.

How many layers depends on the paper. These are starting points; if the bottom petals come out noticeably larger or ragged, the stack is too thick.
| Paper | Layers per cut |
|---|---|
| 65 lb cardstock | 2 to 3 |
| Text-weight paper | 4 to 6 |
| Heavy crepe paper | 3 to 4 |
| Light crepe paper | 6 to 8 |
| Tissue paper | 8 to 10 |
To stop the layers from sliding, hold the stack with a small binder clip or paper clip placed outside the traced line, or staple once in an area that will become scrap.
Tip
If the folded edge of an accordion runs along the base of the petal and you stop cutting just short of it, the petals stay joined in a chain. That is handy for flowers where petals are wrapped around a center in one strip.
The cutting motion
Smooth curves are a matter of how the hands share the work.
- Turn the paper, not the scissors. Keep the cutting hand nearly still, pointing away from the body, and feed the curve into the blades with the other hand.
- Cut with the middle of the blades. Open the scissors wide and close them most of the way in long strokes. Snipping with the tips leaves a row of tiny flat spots.
- Do not close the blades fully mid-curve. Stop just before the tips meet, slide forward, and continue. Each full close leaves a small nick.
- Cut just inside the pencil line so no graphite shows on the finished petal. Tracing on the back of the paper helps too.
- For a notch or a tight inner corner, cut into the point from one side, take the scissors out, then cut in from the other side. Trying to pivot inside the corner tears the paper.
Pay attention to grain
With crepe paper, direction is not optional. The fine crinkle lines must run from the base of the petal to its tip, so the petal can later be stretched sideways into a cup. A petal cut across the grain will not shape and tends to split. The crepe paper basics guide shows how to find the grain quickly.
Cardstock has a milder grain. A sheet bends more easily in one direction than the other; if petals will be curled from base to tip, lay the template so that curl follows the easier bend. For most small flowers the difference is slight, but on large petals it helps prevent cracking.
Choosing a cutting tool
- Medium scissors, about 6 to 8 inches (15 to 20 cm): the workhorse for petals and stacks.
- Small pointed detail scissors: for notches, fringe and tiny petals.
- Craft knife and cutting mat: useful for interior slits and straight lines on heavy cardstock, less so for curves.
- Electronic cutting machine: efficient for dozens of identical cardstock petals, but not needed for any beginner project and unsuited to crepe and tissue.
Keep paper scissors for paper only. Cutting wire, tape or fabric with them dulls and gums the blades, and dull blades fold thin paper instead of cutting it. If adhesive builds up, wipe the blades with a cloth dampened with rubbing alcohol.
Watch out
Give children blunt-tipped scissors and thinner paper, with a small stack or none at all, and keep craft knives for adults. When using a knife, cut on a mat and always pull the blade away from the hand holding the paper.
Fixing common cutting problems
- Jagged or stepped curves: strokes are too short. Use longer strokes and turn the paper more.
- Fuzzy or torn edges: dull scissors, or a soft paper. See the comparison of paper types and weights for papers that cut cleanly.
- Bottom layers a different size: the stack shifted or is too thick. Clip it and remove a layer or two.
- Petals all slightly different: the template is being redrawn by eye. Trace from one firm template every time.
- White edges on dark cardstock: the sheet has a white core. Run a matching marker along the edge, or switch to solid-core cardstock.
Once a pile of clean, matching petals is ready, the next step is giving them form. The guide to curling, cupping and creasing petals picks up from here.
Frequently asked questions
How many paper petals can be cut at once?
It depends on the paper. As starting points, try 2 to 3 layers of 65 lb cardstock, 4 to 6 of text-weight paper, 3 to 4 of heavy crepe and 8 to 10 of tissue. If the bottom petals come out ragged or a different size, reduce the stack.
Which way should crepe paper petals be cut?
With the grain running from the base of the petal to the tip. The fine crinkle lines then run lengthwise, which lets the petal be stretched sideways into a cup without splitting.
Is a cutting machine needed for paper flowers?
No. Sharp scissors and a cardstock template are enough for every beginner project. A cutting machine mainly saves time when a project calls for dozens of identical cardstock petals.